Tuesday, May 31, 2011

And how!

Oops, I did it again.

Tanking the weekend

Welcome back from your long weekend.

Those of you who had a long weekend.

And those of your who are coming back to...something.

Umm...hi again.

So anyway. I actually didn't WoW as much over the weekend as I usually do. Had a lot of other stuff going on. Most of what time I did spend in-game was spent working on my Gnome Warrior, steadily tanking my way through dungeons and leveling her towards the cap.

Friday afternoon into Saturday evening I pretty much flew through the levels. I went from 13 to 35 in that span, even after taking most of Saturday afternoon off to watch the second and third Pirates of the Caribbean flicks. Most dungeons yielded a level, if not two. Most of the groups I ran with were pleasant, if not entirely experienced. It was smooth sailing all the way through. For the most part, I was having fun. And even when I wasn't, I was at least getting rewarded enough to make it bearable.

Starting Sunday morning, things changed. I don't know if it's because it was starting to get a little repetitive, because I was starting to get into dungeons that I was totally unfamiliar with, because people were just set in their bad habits, because all the pleasant folks were spending time being with other people instead of playing WoW, or just coincidence.

Around that time I started ending up in Scarlet Monastery and Maraudon a lot. SM has always been very compartmentalized and Maraudon has become so segmented from it's "winginization" that any one section is over in a blink. That, combined with the climb in experience needed to level slowed down the dings a lot.

And it seemed like every group I got in was just cranky and impersonal. Every time I enter a dungeon, the first thing I do is greet everyone. Usually short and simple. "Hey," or "hey, all." In the earlier dungeons I got responses and sometimes we'd even banter and converse through the dungeon.

In the later ones, by the time I'd finished typing, the DPS has generally already pulled for me. No one would respond at all and the whole run would be done in silence.

Mages and Hunters seem to be the most impatient. Probably because they have ways of saving themselves when they pull and I choose not to pick up the mobs. As soon as that whole pack starts going for my healer, I grab them.

In one SM:Armory run, every time I pulled the Hunter would run ahead, pull the next 2 or 3 groups, bring them all back towards us and Feign Death.

I had a Scholomance run where a Warlock declared he was able to tank. He was booted after causing two wipes (only instance so far where there's been wipes) and killing himself three additional times.

Generally every run includes at least one person that refuses to attack my target, if not all the DPS. Ferals, I'm sad to say, seem to be the worst offenders in this regard.

I can see now why when people start hitting current-expansion dungeons, they have unrealistic expectations of how they should be run and are general poor performers. I don't want to go so far as to say the low-level dungeons encourage bad play...but they certainly don't punish it.

So far I haven't been called a bad tank (probably because I'm not) or had any real negativity directed at me (because I just do my job and wait for the run to end when it gets unpleasant). But the whole experience has become decidedly unfun and I just haven't had the motivation to queue.

Between Sunday and Monday, I only gained another 8 levels. Granted, given the amount of time I actually spent playing those two days, that's still not bad at all. And 30 cumulative levels over a 72 hour span isn't too shabby given that I pretty much only played mornings and/or nights over most of those three days...nothing in the afternoons.

I think I'm going to give it a solid rest for a few days and then make a push to get to Outland. If it gets better, awesome. If not, I may forgo the whole level-by-tanking-dungeons thing and fall back on questing. Not that I'm excited about the prospect of questing Outland and Northrend again, but at least I won't have other people ruining that for me.

Friday, May 27, 2011

Bear updates in the 4.2 Patch Notes

Some interesting Bear updates in the latest 4.2 PTR patch notes:
  • Bear damage abilities were scaling too fast with higher gear levels compared to other tanks, so the following balance changes have been made. All the numbers cited are for level 85 characters; numbers will be lower for lower-level characters
    • Faerie Fire (Feral) base damage has been raised to 2950, up from 679. Attack power scaling has been decreased to 10.8%, down from 15%.
    • Maul base damage has been raised to 35, up from 8. Attack power scaling has been decreased to 19%, down from 26.4%.
    • Pulverize weapon damage percent has been decreased to 60%, down from 80%. Damage per Lacerate application has been increased to 1623, up from 361.
    • Mangle (Bear) weapon damage percent has been decreased to 190%, down from 260%. Bonus damage has been increased to 3306, down from 754.
    • Swipe base damage has been increased to 929, up from 215. Attack power scaling has been decreased to 12.3%, down from 17.1%.
    • Thrash initial base damage has been increased to 1464, up from 339. Initial damage attack power scaling has been decreased to 13.8%, down from 19.2%. Periodic base damage has been increased to 816, up from 189. Periodic damage attack power scaling has been decreased to 2.35%, down from 3.26%.
    • Lacerate initial base damage has been increased to 3608, up from 2089. Initial damage attack power scaling has been decreased to 5.52%, down from 7.66%. Periodic base damage has been increased to 69, up from 16. Periodic damage attack power scaling has been decreased to 0.369%, down from 0.512%.
  • Natural Reaction damage reduction has been increased to 9/18%, up from 6/12%.
What does this mean for us?

I'd like to sit here and say I saw this coming. But the truth is that when I see "Base Damage X and AP Scaling Y," I just kinda gloss over. It's never been my end of the game. Too much theory. Gimme application. How do I hold one mob? Two? Five? Ten? How do I make sure I live when that's happening? Where do I need to hold said mobs to give my raid the best chance of surviving? Those are the things I worry more about.

But if you look at the numbers with a little bit of hindsight, it's pretty obvious this was going to happen. Small base and huge scaling percentage? Yeah...your damage is going to run away at some point.

If you're a raid-geared tank, I doubt you'll see much difference when the patch goes live. I have a feeling these numbers were balanced to keep that gear/performance ratio pretty much in the same spot.

Where I think this could have an effect is on Bear tanks still in Dungeon and Heroic blues that are trying to raid gear themselves.

As you may remember from patch 4.1, the threat modifiers of a lot of our abilities where stripped away and were replaced with higher damage output to compensate. If scaling was an issue, specifically in that Tier 12 damage output would be too high, than it stands to reason that Dungeon/Heroic damage might have been a little low. Or at the very least, that with the evening out of the damage curve, it's going to bring Dungeon/Heroic damage up a little bit.

So for you non-raiding Bears out there that have maybe been having some threat and aggro issues, you may have a little easier time of things if/when these changes go live.

Wednesday, May 25, 2011

Light help me...

One of the big achieves my guild has been going for is Stay Classy. We've had a thread on our forums since early February tracking our progress and keeping people in the loop about what we still need.

As of right now, we're actually very, very close. We're only missing 7 total race/class combos and many of those are 80 or above already. A few of them are either already Honored or already 85, and so they just need to complete the second half of the achieve requirements.

The two glaring exceptions at this point are Worgen Priest (though we have a couple people working on them now) and Gnome Warrior. I've taken up this latter portion of the challenge now that Maeniel is at 450 Enchanting and is effectively functioning as my mats factory.

Meet Sanele. (The random name gen found the name...after almost 10 minutes of names I'd never use. I couldn't pass it up.)

I've decided that, similar to Dinaer's Mage experiment, I'm going to level Sanele through dungeons. To lower my queue times and hopefully make this a relatively quick trip, I've decided I'm going to do it as a tank.

I'm really not sure what I'm in for here. I've never tanked anything level-appropriate prior to Kara. With the exception of going in for the achieves, I haven't even set foot in most of the pre-BC dungeons since...well...pre-BC. They're more than half the reason I almost quit the game while still in the mid-40s. Gnomeregan broke my spirits in regards to dungeon running. When it looked like I was going to have to run Sunken Temple to keep advancing, I waived the white flag.

KYL is what ended up bringing me back, and what gave me motivation to figure out this whole group aspect of the game was supposed to work. I wanted to be a part of this story, and there was only one way that was going to happen.

So...yeah. I'm probably 2 hours of play time (tops) from being able to queue.

Light help me...

Tuesday, May 24, 2011

A Bear's Guide to BWD: Maloriak

Maybe it's just me and the various strengths/weaknesses of the group I typically work with...but I kind of feel like Maloriak is on the bottom of the difficulty curve of BWD bosses. He should be first and either Magmaw or ODS should be moved inside.

That said, he's not a pushover. He's probably also the most technically
demanding boss from a tanking perspective. It's very easy to slip up and induce a wipe.

Maloriak's also a unique boss in that pacing and timing are very important. There's a right "speed" for this fight. Go too slow and you'll hit the enrage timer. Go too fast and, unless you have a very well-geared add tank and healer or a third tank, you'll get overwhelmed by adds and wipe the raid. More on those in a bit.

As you may have gathered, two tanks are required for this fight: the Maloriak tank and an add tank. Bears can generally handle either. This fight has 20 adds total: 18 Aberrations (released 3 at a time) and 2 Prime Subjects (released at the start of Phease 2). Any Aberrations that haven't been released by the start of Phase 2 will also be released at that time. All the adds are buffed with Growth Catalyst. The more you have in a small space, the tougher they get.

Maloriak is a two phase fight, with the first phase broken up into a series of three mini-phases: Red, Blue, and Green. Each mini-phase lasts 40 seconds.

About 20 seconds after the pull, Maloriak will run to his pot-o-potions and initiate the first mini-phase. It will randomly be either Red or Blue.

For the Red phases the important mechanic is a frontal-cone AoE fire blast that extends the length of the room and shares its damage among everyone it hits. So for this phase you'll want to make sure everyone is in front of Maloriak, with the exception of any non-tanks that get Consuming Flames. Those people should run off to the side until the debuff expires.

For the Blue phases, the idea is to stay spread out. Maloriak will be casting Biting Chill and Flash Freeze, both of which affect an area around the target.

The second mini-phase will also be either Red or Blue, but it won't be the same as the first. So if the first mini-phase was Red, the second will be Blue and visa versa.

The third mini-phase is always Green. The Green mini-phase is a burn phase, where everyone in the room (friend or foe) will be taking 100% additional damage for 15 seconds due to Debilitating Slime. The slime also strips the adds of their Growth Catalyst buff. This is when all the DPS should leave Maloriak and burn down the Aberrations that have been released.

After the Green mini-phase, the loop starts over.

Throughout the phase, there's going to be two spells that you have to keep an eye on. The first is Arcane Storm. This must be interrupted every time and as quickly as possible to keep your raid from taking heavy AoE damage. The second is Release Aberrations. When successfully cast, this spell releases three adds into the room from the vats on the north and south walls. On average, he's going to cast Release Aberrations 5-6 times during each set of three mini-phases. You want him to successfully cast it 3 times. No more, no less. The rest have to be interrupted.

It's best to appoint two interrupters before the fight starts, one for each of the spells.

He'll also be casting Remedy on himself. Warriors can Shield Slam this off, but other tanks are going to have to depend on their raid to get rid of it.

The idea in this fight is to go through the mini-phase rotation twice, letting out 9 Aberrations each time. After that, Maloriak can safely be pushed into Phase 2.

Phase 2 starts when Maloriak hits 25%. From that point on, it's a burn fight.

Maloriak Tank
The first phase doesn't have any positional requirements. Most groups tank Maloriak right where he's standing when you enter the room. He will be running between the pot and the tank during this phase, so keep that in mind. You don't want to have your melee dps chasing him to keep doing their job.

More often than not, one of the interrupters during this phase is going to be the tank. Regardless of which spell you're given to interrupt, don't be too quick on your Skull Bash. You want to be sure you're interrupting the right ability.

If you're interrupting Arcane Storm, it's easy. Just get every one. The air above the raid will fill with lightning streaks, so it's pretty easy to identify.

If you're interrupting Release Aberrations, it's a little harder. You need to be keeping track of how many times it's gone off so you know whether to interrupt it or not. Again, the magic number here is three successful casts prior to each Green mini-phase. The third successful cast should come right before the Green mini-phase starts, otherwise it puts a lot of strain on the add tank and your healers.

After all 18 Aberrations have been released, you don't need to interrupt anymore. Maloriak will still cast the Release, but it won't do anything.

During the Red mini-phases, make sure you keep Maloriak facing your raid. There's nothing else special you have to do. Maloriak will sometimes cast Consuming Flames debuff on you. If you get it, there's nothing you can do. Moving will just cause Maloriak to turn with you, and you don't want to do that. Just pop a cooldown and eat the flames.

During the Blue mini-phases, you need to keep an eye on your raid. Biting chill can land on anyone, even you. Flash Freeze should never be cast directly on you, but it can still chain to you if you're too close to the person it is cast on. Generally this won't be an issue. Just make sure you tank Maloriak in the same spot throughout Phase 1 and it'll be everyone else's job to stay away from you during the Blue mini-phases.

When Maloriak starts the Green mini-phase, he's going to leap to the back of the room. Not long after he'll cast Arcane Storm. Your DPS is going to be focused on the adds at the time so it'll be up to you to interrupt that, even if you're typically the Release Aberrations interrupter. This is nice for Bears, since our Skull Bash works from range. We don't have to run all the way to him to interrupt.

Once you've interrupted the Storm toss out a quick Swipe and Thrash to help with the adds if they're nearby and then drag Maloriak back to his normal tanking spot.

When Phase 2 starts, your job gets a little tougher. Maloriak will begin casting Magma Jets. This puts a line of fire on the ground in front of him (not at a random target, as the tooltip says) that does heavy damage if it hits and leaves a trail that will damage anyone that runs through it. When he starts casting this, you need to move out of the way fast.

I've seen two different tactics for dealing with this spell.

I like to keep Maloriak where he's been the entire fight. When Phase 2 starts, I immediate face him towards the pot. When the first Magma Jets goes off, I turn him 90°, so that he's facing either the North or South wall. For the second Magma Jets, I run through him, turning him 180°. Finally, for the third, I turn him back 90° towards the pot. Then just keep repeating that. Only two Magma Jets trails are on the ground at a time, so this works out. The rest of the raid just has to make sure they stay in the front half of the room.

The other tank in my raids likes to kite Maloriak along the edges of the room, keeping him facing the walls for each Magma Jets cast and then moving him between. This requires a lot more movement and coordination by the tank (I think), but it also frees up the entire room for the rest of your raid.

Regardless of what method you choose, make sure to keep an eye out for floating ice balls and steer clear of them.


Aberrations Tank
The Aberrations tank job is simple: pick up and hold the Aberrations until the Green mini-phase.

You have a little bit of time at the start of the fight before any of the Aberrations are released where you can help DPS Maloriak. Once that first Release Aberrations goes off, though, you have to be ready to get the adds.

The Aberrations can come from a lot of different spots in the room and it can be difficult to pick them up, given our limited ranged options. Usually this isn't a big deal, though. Almost every raid has one healer who picks up more heal-aggro than the others. Just park yourself near that healer and pull the Aberrations away as they get there. You may have to Growl at the occasional straggler, but that's easy enough.

The most important thing for the Aberrations tank to do is keep the adds away from Maloriak. Their Growth Catalyst buff spreads to him, too. You don't want that happening.

Also watch your positioning during the Blue mini-phases. Like Maloriak tank, Flash Freeze should never be cast on you, but it can still chain to you if you're not careful. You also don't want to be taking the pulsing Biting Chill damage from another raid member, especially once you get beyond three Aberrations.

During the Red mini-phases, you probably shouldn't be standing in the path of the Scorching Blast, either.

Make sure you're communicating with the interrupters to keep them informed of how many adds you have. Three is no real threat. Six starts hurting a little. Nine is going to require heavy heals and good use of your cooldowns. This is why you don't want the third Release Aberrations cast to go off until right before the Green mini-phase. The longer you have 9 adds doing 180% damage to you, the hard this fight is going to be.

More than 9 will wipe all but the most uber-geared tanks.

There's usually going to be an uninterrupted Release Aberrations cast during the first Green mini-phase. All your DPS are going to be busy burning down the current adds, and the Maloriak tank's interrupt is going to be on cooldown from having interrupted the Arcane Storm just before it. So...no rest for the weary there.

Once all 18 Aberrations have been killed, you can go Cat again and help your raid DPS Maloriak into Phase 2.

At the start of Phase 2, Maloriak is going to release any unreleased Aberrations (hopefully none) and the two Prime Subjects. The Subjects are always going to come from opposite ends of the room. They're untauntable and they have to be picked up as quickly as possible. Shortly after they're released, they're going to fixate on whoever they're aggroed on for the rest of the fight. It needs to be you.

Once you have them, you just need to hold them until your DPS have killed Maloriak.

Like the Aberrations, the Subjects have the Growth Catalyst buff. Make sure you keep them far away from Maloriak. Avoid any floating ice balls you see. And if one of the Subjects is fixated on a raid member other than you, take the other one away to reduce the damage that other person takes.


Once Maloriak is down, you'll be looking for the Aberration's Leggings and the Cloak of Biting Chill, which is T11 BiS cloak for Bears.


As with all my boss strats, I'm writing from the overall perspective of a Bear tank (in 10-man) and what they will need to do. For you Cats reading this blog, I suggest you check out Dinaer's guides on Forever a Noob. They're written for Rogues but are a pretty good guide for melee in general and his gear drop suggestions (with the exception of weapons) will be spot on for Cats. If I have additional insight, I will try to add it in my blog.

Monday, May 23, 2011

Fun times in ICC

So an interesting thing (to me) happened last night.

We put together a semi-impromptu group to go run H ICC to try and get the guild achieve for a H LK kill and to make some inroads on getting people their Frostwrym mounts. Initially the invite only went out to people who were Kingslayers before Cata dropped (because I had no idea how difficult it was going to end up being), but when a lot of people just couldn't make it on a Sunday, we ended up pulling in people that just happened to be online so we could go. I figured, if nothing else, it would be a good way to see what we were up against for future attempts.

As we went through I gave brief descriptions of important stuff on each of the fights, but they were hasty and vague at best, especially on the later bosses. And a lot of them ended with, "I don't know what's different on Heroic mode. We'll just pull and figure it out."

Between determination and the fact that the Heroic modes are a lot more brute-forcible than I was expecting, we made a fairly rapid trip all the way up to the Frozen Throne.

I think a good summation of the night was when I was trying to describe the LK fight and more or less resorted to, "We're really short on time and I don't want to spend it going over this fight in detail. Just listen and be ready to react."

And everyone did. Again, we may have outgeared the fight significantly, to the point where some mechanics were trivialized. But there's other mechanics during that fight that no amount of gear can overcome. It's attentiveness and reaction only.

We didn't get the heroic kill. But out of 3 attempts, we came damn close twice. Both times we were done in by a Defile that we didn't react to quite quick enough.

But I think it speaks volumes about the raiders in that run that I can say, "just listen," and we can almost kill H LK the first time any of us have seen it in that mode, overgeared or not. And for a few raiders in that group, that's a long way to have come from when they first started running with us.

Despite the non-kill, it was still a nice high-note to end my weekend.

Friday, May 20, 2011

Random thoughts on Aspects

Have you seen the new Nozdormu model yet? Blizz is gettin' serious with their Aspects.

I'd hit it.

What's more interesting, though, is the fact this marks the first time since WoW's inception that Nozdormu is more than a whisper or an apparition. His whereabouts (and whenabouts) have been a complete mystery for the last 6+ years. No one's really sure what he's been up to.

Clearly the choosing of a new Aspect is a good reason to finally show up. It's probably one of the most profound events in Azeroth's history. Certainly unprecedented. But I have to wonder how he's going to be welcomed. And what kind of questions is Alexstrasza going to have for him? Afterall, there's evidence that suggests he's responsible for, if not leading, the Infinite Dragonflight.

Each expansion has had little bits of Infinite lore scattered about. In Vanilla it was the time distortions in Andorhal. In BC we got Durnholde and the Black Morass. And, to a lesser degree, Hyjal Summit. In Wrath it was the Bronze Dragonshire and Old Stratholme.

Could Nozdormu showing up now be a lead-in to the rumored Caverns of Time: War of the Ancients raid we've been hearing about? Is this story going to be coming to a head soon?

Should be interesting to see how long he sticks around.

Also, on the topic of picking a new Aspect...

For as unprecedented as it is in the thousands and thousands of years that Azeroth has been around, it's something that's going to play out again in the very near future. There's little question that we're going to be killing Deathwing. The Earth Aspect will soon be no more. (You can argue he hasn't been for a while.)

Who's going to step up and lead the cruel, arrogant Black Dragonflight? Can you think of any Black Dragon you've come across in game that you would want in charge? Have you seen any (beyond Nef and Ony) that would even qualify?

Of course, rumors are that Thrall will get the job. Wouldn't that be interesting? A mortal from another world becoming an Aspect. Is it possible? Can an aspect be not-a-dragon? What would Varian have to say about that? (Hopefully, "I give up. Anduin, you're in charge now.")

And I kind of wonder...will Nozdormu be next on the replacement list? (Chromie, you're up.)

Wednesday, May 18, 2011

OMG Premium Fees??!!?1

I kinda pay attention to the blue tracker on MMO-Champion just because I like to see what the devs are commenting on...even if half of them end up being "locking this thread because the community can't handle their shit".

The problem is that after about 10 minutes of reading these posts, I get into the same state of mind that reading the comments section of news articles gets me to...namely pissed off at how ignorant and spiteful everyone is. I realize it's a small, but very vocal minority projecting this image. But when something is inundated with that kind of vitriol, it's hard not to generalize.

So of course, this morning there's about eleventy-billion threads about Cross-server Friends List LFD being a Premium Service that people have to pay additional for.

Now, before I go further, I'm going to fully admit my bias on the subject.
  1. All the people I want to play with are already on my server. So this isn't a feature I really need.
  2. I am a full-time working adult with a decent job, as is Norfin. The only debt I'm currently carrying is my mortgage. The only "dependents" I have are our two dogs. With rare exceptions, I don't rack up more on my credit cards than I can pay off at the end of the month. So I have a fair amount of disposable income.
I realize a lot of people aren't in the same boat as me. That said...

Seriously, people? Get over yourself.

Yes, you already pay a monthly fee. You want to know where that goes? Two years worth of content patches...art assets, class mechanics, animations, zones, boss encounters, questlines, etc. CMs that read the forums, put up with your BS, and respond when appropriate. GMs that answer the endless stream of tickets submitted and are generally very quick to respond. Oh, and let's not forget the servers that run the game. In case you were unaware, Blizz worked closely with AT&T to design some really crazy, proprietary stuff that lets (all 11M+ of) us play the game as seamlessly as we do. And if you think that designing or maintaining that kind of technology is cheap, you're either dumb or delusional. This isn't a desktop system you can just replace every couple of years and occasionally upgrade your graphics card.

And that fee is nominal. Seriously. Your monthly fee buys you, on average, 730 hours of play time. I can't go to the theater and watch 4 hours of movies as cheaply. What the hell are you complaining about? If you don't already feel you're getting your value out of it, that's your own fault.

But, San! Why should I have to pay more money to play with my friends?

I'd ask why you aren't already playing with your friends. No one's forcing you not to. Last I checked, you can choose to roll a character on any realm you want. Blizz doesn't pick for you. So, somewhere along the line, you and your friends made your own choices to not play together.

If you've since realized you made a bad choice, server transfers are available for a one-time fee that's less that what the premium services cost for a year. Rerolls are free. And it's ridiculously easy to level to the cap, even with zero heirloom gear. Hell, you can even level together. Then you get the whole game with your friends 24/7, not just LFD.

Of course, if being in your level-25, 1337 13/13H raiding guild is more important to you, then that's fine. That's your choice, too. But don't complain when you can't have everything your way. Sometimes you have to make those kinds of choices.

Only now the choice isn't "do I want A or B?" It's "am I willing to play a little bit more for B so I can still have A at the same time?" That seems reasonable to me. It's kind of how the world works.

But, San! Blizz has said over and over they won't charge us for services that give certain players advantages over others! And now they are!

I fail to see how this does that. Granted, I'm a competent player in a big guild that also has many other competent players. I don't need LFD. That said, I still sometimes use it. And I get by just fine.

How do you know your friends are any more competent that the average LFD'er anyway? What kind of "advantage" does this feature actually provide that you can't get anyway? Please, make a logical case if you can.

But, San! This is the next step in the inevitable free-to-play, microtransactions-for-everything end-goal. Soon we'll have to pay extra for instances and raids and epic gear and...

Ah, yes. The slippery slope argument. Did you know that if we allow gay marriage, soon people will want to be marrying their box turtles? It's true.

Also, if I keep reading and talking about this drivel, I'll end up as mentally paralyzed as all the half-wits spewing it. I mean...probably not. But just in case, I'm going to stop now.

Tuesday, May 17, 2011

A Bear's Guide to BoT: Halfus Wyrmbreaker

I've been putting this particular guide off for weeks and weeks. I wanted to cover all the "entry" raid bosses before I started discussing the ones further into each raid, but I've been dreading this one. How do you write a tanking guide for a fight that can change from week to week?

There's 3 aspects to this fight that are important. First is your main objective--the big etin, Halfus. He does need to be tanked, so you will have to worry about him.

Halfus swings moderately slow (usually), but does hit pretty hard. Starting from the moment he hits 50%, and then periodically thereafter, Halfus casts Furious Roar 3 times in quick succession. This acts as a raid-wide 6-second stun plus damage. The good news is that Halfus isn't attacking while he does this. The bad news is that anything else involved in the fight still is.

Second is Halfus's pet Proto-Drake. The PD flies above the raid and rains down fire on everyone. It can't be killed. It can't be tanked. It's just there as a source of raid damage. Its standard attack is a fireball with splash damage. For this reason, you'll want to stay spread out. This is particularly important as a tank. If you're already taking damage from Halfus or MC'd dragons, you want don't want to be taking splash damage from standing too close to your other raid members as well.

Third is Halfus's assortment of captured dragons. There's five total, three of which are going to be "active" any given week. (The other two will have "knock-out" stars swirling above their heads and are non-factors.) Using some trusty HS probability (n!/(r!(n-r)!)), for n=5 and r=3) we come up with the nice, round number of 10 possible combinations of dragons you might have to worry about.

Each of the three active dragons is going to give either Halfus or the PD some kind of buff or additional ability. Each one also has the potential to give a debuff to the same target. The catch is that in order to activate the debuff you need to release the dragon from captivity--at which time Halfus is going to MC it and you have to kill it. This will also require a tank, though they're all just tank-and-spank adds. The debuff remains active even after you've killed the dragon.

How you handle the dragons is going to be where your strategy changes from week to week. This can vary based on your healers, your tanks, and your overall raid dps. You can "free" the dragons in any order you want. You can also free as many at a time as you want. Again, there's a trade-off here. More freed dragons equals more debuffs on Halfus and/or his PD. But it's also more strain on the tanks and healers.

The dragons are friendly at the start of the fight, so feel free to walk right up to them. Once Halfus is engaged, your pointer will turn into a lock when hovering over a dragon. Right-click to start channeling the release. Make sure you don't move or re-click while you're doing this, just like any channeled spell. Once the channel is complete, you'll have about three seconds before the dragon gets MC'd and you have to grab aggro.

There's a 6 minute enrage timer on this fight, but each time your raid successfully kills one of the dragons, Halfus takes an additional 100% damage.

In my group's runs, we generally end up killing all three active dragons. More often than not, we'll bring the first two out at the same time and then go for the third when they're both down. Usually we down Halfus with about 30-seconds to a minute left on the enrage timer and my guild isn't known for our amazing DPS output.

The base strategy for this fight is one tank on Halfus and one for the dragons that you'll be killing. Or course, it's never quite that simple.

Proto-Drake Dragons
These dragons give their buffs/debuffs to Halfus's PD. Having either or both of them active is going to increase the total damage going out to your raid. Freeing them helps bring that raid damage back down to easier-to-heal levels.

Time Warden (Bronze Drake)
The Time Warden is on the right side of the room from where you enter. When he's active, the PD gains the Fireball Barrage ability, which is exactly what it sounds like. Every 30 seconds or so the PD will rain down a barrage of fireballs on your raid.

When you free the Time Warden, he places Time Dilation on the PD. This makes its fireballs (both standard and the Barrage) avoidable. Fire plumes will appear on the ground where the fireballs are going to hit and you'll have a couple seconds to get 4 yards away from them before impact. So if you see them appear under your feet, move.

This isn't the most important dragon to free at the beginning of the fight, but it's not the least either. If you plan freeing two dragons at once, this should probably be one of them, though. Otherwise the combined damage of the dragons and the PD's fireballs will likely kill you.
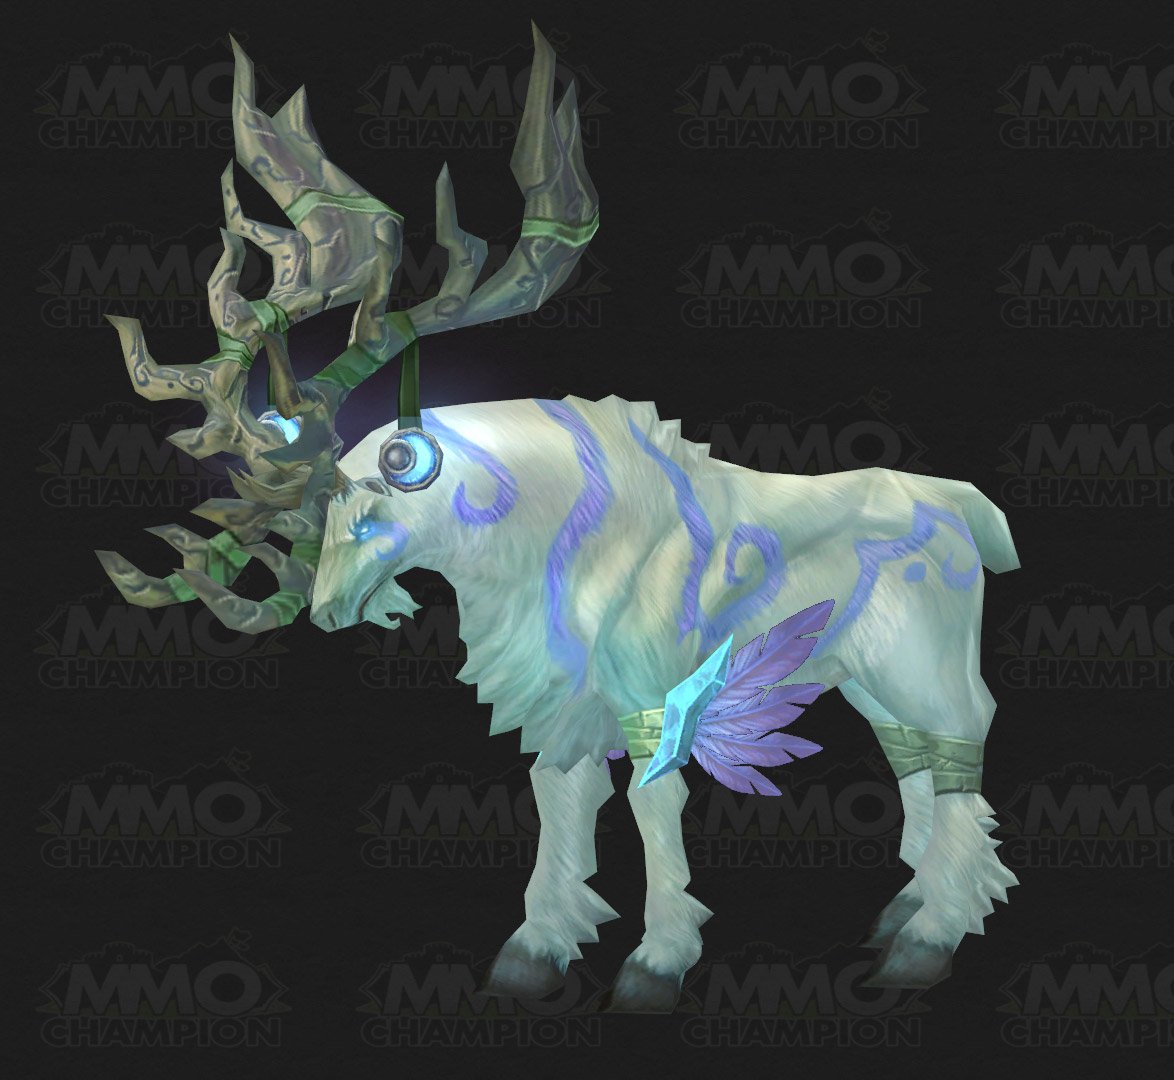

Orphaned Emerald Whelps (Many whelps!)
The Whelps are caged up to the left of the Time Warden. When they're active, they give the PD the Scorching Breath ability. While the ability says that it damages enemies "in front of the caster," your entire raid is in front of the PD and in range of this breath at all times. So it's effectively an 8-second raid-wide AoE.

To free the Whelps you actually have to click on the cage, not the Whelps. Once they're out, they cast Atrophic Poison on the PD, lowering the damage of all his abilities. 750 damage may not seem like much, but the ability stacks and each of the 8 Whelps applies one stack. That's 6,000...a significant difference.

I'd argue that Bears are the most ideal Whelp tanks, thanks to our mobile AoE tanking prowess. If you are tanking the Whelps, it's important that you wait until they're hostile to start Swiping and Thrashing, or you might find yourself waiting several long seconds without being able to pick them up. If you do get a little over-excited, a well-timed Challenging Roar can save the day.

From a tanking perspective, I'd call the Whelps the next-to-least important to free. That said, if the Time Warden or Storm Rider are also active it's very easy to pull the Whelps with either of them and have your DPS go AoE crazy at the start of the fight. Once the Whelps go down, the drake will already be missing a good chunk of health.


Halfus Dragons
Obviously, these are the dragons that give their buffs/debuffs to Halfus. These dragons each add a mechanic to the encounter that has to be dealt with in some manner and generally increase the damage taken by the Halfus tank. Freeing them makes the extra mechanics easier to deal with and/or reduces the amount of damage the Halfus tank will be taking.

Storm Rider (Wind Drake)
The Storm Rider is immediately to Halfus's right. When active, he gives Halfus a Shadow Nova, which is a raid-wide damage and knock-back ability on a 0.25 second cast.

When you free the Storm Rider, he casts Cyclone Winds on Halfus, which makes the Shadow Nova a 1.5 second cast...something you can actually interrupt.

In a 10-man group, the time between Shadow Nova casts is such that a tank can single-handedly interrupt them all. Make sure that you do.

Once Halfus gets to 50%, he'll cast a Nova immediately after his third Furious Roar. There's nothing you'll be able to do to interrupt it at that point, so just be prepared to deal with that.

I generally feel the Storm Rider is the first dragon that should be freed any time it's active. Whether or not you free another of the dragons along with it is up to you and your raid, but the knock-back effect on the Nova is extremely disruptive and you should be making sure it can be interrupted from the very first one.


Slate Dragon (Stone Drake)
The Slate Dragon is immediately to Halfus' left and it's pretty much the bane of this fight from a tank's perspective. When the Slate Dragon is active, Halfus gains Malevolent Strikes, which causes his attacks to place a stacking 6% healing-received reduction debuff on the tank each time they land. The debuff stacks up to 15 times and lasts 30 seconds from the final application.

When the Stone Drake is active, Taunt-swapping enters the picture.

When you free the Slate Dragon, he'll place Stone Touch on Halfus, which will periodically stun him for 12 seconds.

The Slate Dragon will usually be the last one freed. The 12 second stun on Halfus is nice, but it's not what I'd call a game changer. The Malevolent Strike stacks last longer than that, so taunt-swapping is still the only way to drop them. And a frozen Halfus makes taunt-swapping harder because...well...a frozen target doesn't move. You'll gain aggro over the other tank, but it may not be immediately apparent and can just lead to confusion.

If your raid is only freeing one dragon at a time (Whelps excluded), then a true tank-swap should occur. The Halfus tank should take the dragon and visa versa. If you're freeing two dragons at once, or you have the Whelps, this becomes much more difficult. In a two-dragon situation, the dragon not being burned down by the raid should be the one the Halfus tank taunts. If the Whelps are involved, the Halfus tank should be taking any active non-whelp dragon.

The first swap should occur when the Halfus tank hits 5 or 6 stacks. This is going to happen not long after the add tank gets initial aggro on any dragons, so it can get dicey right there.

Each subsequent taunt should happen the moment the non-Halfus tank's stacks drop off. This taunt-swapping will continue through the duration of the fight.

A third tank, or a well-geared DPSer in the right stance/presence/form can help a lot if the two tanks alone struggle here.


Nether Scion (Nether Drake)
The final potential dragon in this fight is the Nether Scion. It will be all the way on the left, just inside the entrance as you come into the room. When the Nether Scion is active, Halfus gains Frenzied Assault, increasing his attack speed by 100%.

If the Nether Scion and Slate Dragon are both active, this fight becomes nightmarish.

When you free the Nether Scion, he casts Nether Blindness on Halfus, reducing his attack speed, hit chance, and damage done all by 25%. Effectively, this brings his damage output just below where it would be without the Nether Scion being active. Malevolent Strike debuffs will still stack slightly faster than normal, though.

The Nether Scion is second only to the Storm Rider in freeing priority. And if they're both active, you should probably do what you can to free them both right from the start. The best way to do this (minus a third tank) is to make sure you keep your raid far away from one of them. Have a DPS free that one and then high-tail it back to the rest of the raid. (Rogues, Mages, Warlocks, and Shamans with 2/2 Ancestral Swiftness are good candidates.) Once the dragon becomes hostile, Growl and F3 before it hits anyone else.

Blow cooldowns.


As far loot goes, Halfus is okay for Ferals. Essence of the Cyclone has a lot of Agi on it, but the Crit proc is much more suited to your Cat set than your Bear one. Malevolence is in a similar boat. It is a pretty nice Bear weapon and you shouldn't be turning your nose up at it...but your inner Cat is going to get more value out of it than you will. The Storm Rider's Boots are also a very nice drop if you haven't acquired your tier boots yet.


As with all my boss strats, I'm writing from the overall perspective of a Bear tank (in 10-man) and what they will need to do. For you Cats reading this blog, I suggest you check out Dinaer's guides on Forever a Noob. They're written for Rogues but are a pretty good guide for melee in general and his gear drop suggestions (with the exception of weapons) will be spot on for Cats. If I have additional insight, I will try to add it in my blog.

Monday, May 9, 2011

More of Dad's adventures in Azeroth

Well, it's been almost 3 months since I last wrote about my dad's exploits in Azeroth, so I figure it's about time for another update.

As for the content of the last post...

I did spend that weekend down at my parents' place, most of which was playing WoW along-side dad.

We worked out a Prot spec, figured out the rotation, and shored up some of the holes in his tanking gear. A lot of this was a learning experience for me, too, as I had no idea how Prot Warriors played.

I also got him set up on Vent and showed him how to use that.

By the time we did all that and got a group together, we really only had time for one run. We took it slow, but overall he did pretty well. He held primary targets just fine, and did a good job of not breaking CC. The biggest weak spot was not realizing when he lost aggro on tertiary targets or when CC would break and a new mob would enter the fray mid-fight and go straight for the healer. "Taunt Star," was probably the one thing I said most often.

Sadly, we haven't been able to run another dungeon since then and that's something I feel legitimately bad about. My dad's mostly a weekend day-time player, and most of our guild members that are more patient and willing to take the time to go on those sorts of runs are evening players. So it's been hard to mesh our schedules and get a group. But it's something I want to try harder to do, because I think he had a lot of fun tanking for us. And actually playing together.

That doesn't mean he's been idle, though. He took up Mining and Blacksmithing on his Warrior, though not at the same time. He didn't pick up BS until after he'd maxed out mining...and had already sold most of the low-level ores he collected while doing so.

He also rolled a second toon. He now has a Gnome Mage that he's been working on and has already gotten him to Zangarmarsh. Being home for Mother's day last weekend provided the first opportunity I've had to really talk to him about it since he started the toon. I was happy that he seemed to be legitimately enjoying it, rather than just kinda falling back on it as "something to do." He was really excited about the fact that he'd been able to solo most of the group content out in Hellfire with good usage of Mirror Image. He even managed the quests out on the West end of the zone where you have to kill the big, red rock giants. One at a time, mind you, waiting for the cooldown on Mirror Image to expire between each. But still, that's impressive. Most of the toons I've taken through there, I couldn't solo those while level-appropriate.

The only one he needed help with was Arazzius. I was out there on Maeniel at the same time, so I actually got to help out on a level-appropriate toon for the first time since he started playing and I followed him around on a baby Pally. Almost every other time he's needed help with group stuff, I've either had to go out there on San or Dal and just keep him healed up while he fought, or ask Norfin to jump on one of his toons closer to the right level and go help. (He doesn't like it when you take an overpowered character to "help" and then just slaughter whatever he's up against. Not that I blame him. I don't like helping or being helped that way most of the time, either.)

He's also been working on Enchanting and Tailoring on the Mage as he's leveled and has kept those up with the curve. So he's definitely got professions down now.

Of course it wouldn't be a trip home without a fun noob moment to share. We were sitting on the couch chatting about the mage and he mentioned that he really liked how many ways he had to freeze mobs and run away from them when he needed/wanted to. This got me wondering...

"What tree did you spec down?"
"Frost."
"Frost? Really?"
"Yeah. Why?"
"If you were Frost, you should have a Water Elemental running around with you, helping you out. I've never seen you with one."
"Oh, I have him. But I couldn't seem to make him do anything, so I just put him away and left him there."

He's gone from 10 (Frost Mages get the elemental as soon as they select that tree now) to 65 without it.

So I got to go teach him pet management and how they work. For example, selecting the Move To command and placing them out amongst some mobs is not very effective.

Thursday, May 5, 2011

First impressions on T12 bonuses

When I was driving to work this morning I had about 3 different ideas for posts spinning around in my head. Then I got to my desk, did quick perusal of My Morning Internet™ and instantly settled on a fourth option.

Wowstiq has posted preview of the T12 Set Bonuses. A lot of them are nice, but two in particular stood out for me.

The first was the Shadow Priest 4pc bonus:
4-piece While you have Shadow Word: Pain, Devouring Plague, and Vampiric Touch active on the same target you gain Dark Flames, which reduces the cooldown of Mind Blast by 3 sec.
This is a really interesting direction that I don't think I've previously seen in set bonuses. Most set bonuses give you some kind of passive bonus for doing the things you already do (i.e. Resto Shaman 2pc: Your periodic healing from Riptide has a 40% chance to restore 1% of your base mana each time it heals a target) or significantly alter your standard rotations (i.e. Shadow Priest T9 2pc...that extra 6 seconds really screwed me up for a while. I had the first minute of my rotation ingrained into muscle memory.)

While this new Shadow 4pc bonus works similarly by reducing the cooldown on one of the most powerful Shadow Priest spells by a significant amount, it takes it one step further. You have to be playing your class right to get that bonus. On a boss fight, a Shadow Priest should have near-100% uptime on SW:P, DP, and VT. This set bonus further encourages people to learn how to do that in order to make the best use of it. It's a really interesting direction for Blizz to take with the design and I'm very interested in seeing how well it works out.

Similar to that is the new Cat 4pc Bonus:
Your finishing moves have a 20% chance per combo point to extend the duration of Berserk by 2 + (20 * ComboPoints) sec...
While I'm pretty sure the number 20 is a place holder for something much more reasonable (not that I'd complain about a 102 second extension to Berserk) it follows that same trend of trying to get us to play our class the right way.

Common wisdom right now is to Shred like a manic while under the effects of Berserk, ignoring finishers (except to refresh Rip if it's about to expire). While it's certainly a huge DPS spike, it pretty much ignores the way the combo point system is supposed to work. This set bonus encourages Kitties to spend those CPs on finishers (probably Ferocious Bites) in order to try to extend the overall duration of Berserk.

To make this work, though, Blizz needs to really fine tune it. FB isn't in the best of places right now. There are some people who suggest it should be ignored outright until the last 25% of a fight (given 2/2 Blood in the Water). If it's not glyphed it's a very high-cost attack. And if it is, its overall damage potential isn't much better than Shred.

Even under the effects of Berserk, when the Energy cost is reduced, there still needs to be a viable trade-off.

We know that whatever the final number on the time extension ends up being, they're not going to make it high enough to guarantee another 5pt finisher before Berserk expires. Otherwise we could keep ourselves in a Berserk state for the entirety of a fight. But it still has to be sufficiently long for using FB when you already have Rip and Savage Roar going to be a good exchange for those extra seconds.

Or they could just retune FB to make it more viable before the last 25% of a fight...

Complete tangent aside there, it still shows an effort to get people to play Kitty DPS the way it was intended: build your CPs and spend them.

Finally, MALORNE!!!!

Wednesday, May 4, 2011

A Bear's Guide to T4W: Conclave of Wind

Conclave of Wind is the first of the two encounters in the Throne of the Four Winds. It's a pretty unique fight in that your raid group is split up into very distinct groups and personal accountability is extremely high.

There are three separate bosses to this encounter, resting on three platforms connected by air bridges. Stepping on an air bridge whisks you across to the next platform.

Unlike most of the multi-boss fights in Cata, they do not share a health pool. Each boss has their own. When one "dies," it begins to channel a 60-second, uninterruptable regeneration spell, after which time its health pool returns to full. The only way to end the channel is to end the encounter by killing all three bosses. So from the time the first one "dies," you have 60 seconds to finish off the other two.

If any of the platforms is empty while the boss on it is still alive, that boss will channel a spell that silences your entire raid and deals significant continuous damage.

Each boss has an energy bar that goes to 90. They all fill at the same rate. When their energy bars hit 90 (this takes about a minute), they go into a "discharge" phase. During this phase each one will port to the middle of their platform and channel a particularly powerful spell. Additionally, the air bridges disappear for the duration of this phase (15 seconds) so whichever platform you're on when it starts, you're stuck there.

As a tank, you're really only concerned with two of the three bosses: Anshal (West platform) and Nezir (North platform). Rohash (East platform) is very melee unfriendly. He's range-tanked by DPS.

This fight requires two tanks. One will start on Anshal and the other on Nezir. Figure out which tank will be starting on each boss. There will be tank swapping, so you will eventually be tanking each of them. Once you know where you're headed and you're all buffed up, jump across the bridges to the appropriate platform. The bosses don't pull until one of them is actually attacked, so you have some freedom while getting into position.

Tanking Anshal
The Anshal platform is generally going to consist of 3 DPS, a healer, and a tank.

Anshal's main ability is Soothing Breeze. It drops a healing circle directly beneath him that works much like the one the Young Storm Dragons in VP drop. Any enemy inside the circle is going to get a lot of healing. Unlike the circles the Dragons drop, however, any player standing inside the circle will be silenced and pacified (and not healed).

You should be keeping an eye on Anshal's cast bar and running the moment he starts casting this to kite him away. His hit box is a good bit larger than his model, which makes this a difficult task in two ways. 1) You have to move a lot further to actually get him to follow you. 2) It can look like he's out of the circle when he really isn't. Keep an eye on his health bar. If it keeps going up, move him further.

Ideally, you should be tanking and kiting Anshal close to the edges of his platform. If he drops a Soothing Breeze directly in the middle it's very tough to get him out of it.

The other ability Anshal casts is Nuture. He'll do this once per normal phase. Nuture summons a group (5 or 6) of Lasher/Flayer adds called Ravenous Creepers. They'll all spawn near Anshal, but not in any kind of convenient cluster. The Creepers don't hit all that hard, but they do pulse Toxic Spores every 5 seconds.

Depending on your group, there's two ways these adds can be handled. If you have good slow/root CC (Frost Mages and DKs, Hunters, Shamans) you can have your DPS take care of them while you keep focusing solely on Anshal. If not, you'll want to tank them yourself while they're burned down.

The easiest way to pick them up is to stand near your healer, as that's the first place they're going to run. Once you've collected them, your healer needs to get away to avoid the stacking DoT.

I actually recommend the second method for Bear tanks. Our AoE DPS (at least right now in 4.1) is through the roof. With Swipe and Thrash at our disposal, we can really help drop these guys fast. Popping Berserk here is also really nice for those free, rapid, multi-target Mangles.

And Barkskin. Don't forget that.

Also note that Anshal is going to drop a Soothing Breeze shortly after summoning the adds. So you'll need to move him and them out of it quickly.

As Anshal approaches 70 energy, you need to start making your way to the bridge that leads to Nezir's platform. Do everything you can to make sure all his adds are dead by this point. When he gets to 80 energy, you (and everyone else on your platform) should be jumping across. This is where the tank swap occurs. The Nezir tank (and healer) will be jumping onto Anshal's platform at the same time.

Anshal "Discharge" Transition
Upon landing from Nezir's platform, you need to target Anshal and Growl immediately. Depending on the timing of the tank swap, there may still be a few active seconds where Anshal will be taking swings and you want to make sure they're at you, not your healer. Also, if the last group left any adds, you'll need to pick them up.

Once Anshal's energy actually hits 90, he's going to port to the center of his platform and channel Zephyr. It's going to heal him for a significant amount and give him a good damage buff that will last 15 seconds after he's done channeling. Any adds left alive from the previous phase will be healed to full and will get the same damage buff.

When Anshal stops channeling Zephyr, Growl again for good measure and toss an F3 for additional threat.

You'll want wait for Anshal at the edge of his platform near the bridge to Nezir. When the DPS return, they'll have less distance to cover before they can get back to work.

At this point you'll be tanking Anshal until the next tank swap. (Waiting for your Wind Chill debuff to drop off.)

Tanking Nezir.
During the normal phases the Nezir platform is going to have a tank and healer. All the DPS will be working on the other two bosses.

For the most part, Nezir is going to be tanked in the center of his platform. He doesn't need to move much.

Nezir has two basic abilities that you'll be dealing with. The first is Ice Patch. As the name suggests, this drops an ice patch on the ground that does continuous (stacking) damage to anyone standing in it and also slows movement speed. He always drops these directly under someone on his platform. If it's you, just strafe out of the quickly.

His other ability is Permafrost, a frontal-cone AoE attack. As the tank, you can't avoid this. He turns to face you as he casts. You do want to make sure you're facing him so that you're the only one getting hit, though.

Anyone on Nezir's platform during this phase will also be hit by Wind Chill. This will go off several times during the normal phase and is completely unavoidable. It just has to be healed through.

There's not much else to this phase. It's just keeping him occupied.

As Nezir approaches 70 energy, you need to start making your way to the bridge that leads to Anshal's platform. Be careful not to wait right at the base, though. You don't want him to drop an Ice Patch where everyone coming from Anshal's platform is going to land. (This goes for your healer as well.) When he gets to 80 energy, you (and your healer) should be jumping across. This is where the tank swap occurs. The Anshal tank (and group) will be jumping onto Nezir's platform at the same time.

The transition from Nezir's platform to Anshal's really sucks. Odds are that Nezir is going to cast Permafrost just as you (and your healer) are jumping across. The game tends to not realize you've gone out of range until you land on the other side and so you (and your healer) will be taking the damage all the way across the bridge without your healer being able to cast anything but insta-cast spells. Being at full health before you cross is nice.

Nezir "Discharge" Transition
Upon landing from Anshal's platform, you need to target Nezir and Growl immediately. Depending on the timing of the tank swap, there may still be a few active seconds where Nezir will be taking swings and you want to make sure they're at you, not anyone else in your group.

Once Nezir's energy actually hits 90, he's going to port to the center of his platform and channel Sleet Storm. It's going to do 30K DPS to everyone on the platform divided by the number of people on the platform. You should have all 5 DPS (this is when they go ape on Nezir to try and get his health down), your healer, and you on Nezir's platform at this point...so a little over 4K DPS per person for 15 seconds. (About 64K damage total, each.)

During this phase you should be standing on the North side of Nezir (the side furthest from the entrance and Al'Akir) and building threat. As soon as he's done casting Sleet Storm, he's going to cast Permafrost and you want to make sure none of your other raid members get hit by that.

At this point the DPS are all going to return to their respective platforms and you and your healer are going to stay there until the next tank swap.

"Death"
If you're tanking one of the Djinn as he approaches death, keep a close eye on him. His health pool will stop at 1 and he will become invulnerable, but not inactive. You won't lose him as a target and you can still attack him, so it's not immediately obvious that you're done there.

The animation for the channeled heal spell has four air streams curving out, up, and back into the boss, making him look kind of like a stereotypical crown. When you see this, quickly head to one of the other platforms, go Cat, and do what damage you can to end the encounter.


Loot for the Conclave is somewhat unique. They drop rings and belts that have "random" stats. For Bears, these are what you're looking for:
Mistral Circle...
  • ...of the Windstorm (best)
    +285 Stam, +190 Agi, +126 Crit, +126 Mastery

  • ...of the Stormblast
    +285 Stam, +190 Agi, +126 Hit, +126 Crit

  • ...of the Windflurry
    +285 Stam, +190 Agi, +126 Crit, +126 Haste

  • ...of the Zephyr
    +285 Stam, +190 Agi, +126 Haste, +126 Mastery
Wind Stalker Belt...
  • ...of the Windstorm (best)
    +380 Stam, +232 Agi, +160 Crit, +160 Mastery

  • ...of the Stormblast
    +380 Stam, +232 Agi, +160 Hit, +160 Crit

  • ...of the Windflurry
    +380 Stam, +232 Agi, +160 Crit, +160 Haste

  • ...of the Zephyr
    +380 Stam, +232 Agi, +160 Haste, +160 Mastery


As with all my boss strats, I'm writing from the overall perspective of a Bear tank (in 10-man) and what they will need to do. For you Cats reading this blog, I suggest you check out Dinaer's guides on Forever a Noob. They're written for Rogues but are a pretty good guide for melee in general and his gear drop suggestions (with the exception of weapons) will be spot on for Cats. If I have additional insight, I will try to add it in my blog.

Tuesday, May 3, 2011

Raiding Progress

The last week was a pretty good one for my raiding team. On Thursday we went into BWD and managed to clear all the way up to Nef in the span of 2.5 hours. This included a one-shot of Atramedes (guild first kill, second time attempting) and a three-shot of Chimaeron (also a guild first kill, first time any of us had seen him).

The Chimaeron attempt was particularly crazy. Our first attempt was a disaster just because I didn't have a good handle on the tank swapping mechanic. Once I saw it (and failed it), it was pretty easy to figure out. But that attempt lasted about 30 seconds.

Our second attempt was a little smoother, but something went wrong at the end of a Feud and wiped half our raid, including all 3 healers. We may have spread back out too quickly, but I'm honestly not completely sure what happened.

The third attempt was smooth sailing through the first phase. And for a moment it looked like we were going to hit the 20% mark and get into Phase 2 during a Feud, which would have been glorious.

Then I made the mistake of sharing our good fortune over Vent.

Instead of hitting Phase 2 during the Feud, we came up just shy an instead hit it right after a Massacre.

For those of you unfamiliar with Chimaeron, Massacre reduces everyone's hit points to 1. (That's not the actual ability, but that's how it works out 99% of the time.) When Phase 2 hits, all healing is reduced by 99%. Can you see how this might be troublesome?

I swore. In Vent. Which is a no-no in our guild. But I couldn't help it.

I was just about to call for the wipe, but then something miraculous happened. About 5 seconds had gone by and most of us were still alive...including me. I still figured we were doomed, but at that point it was worth trying.

I popped Survival Instincts and--out of little more then muscle memory--Frenzied Regeneration. The healing portion of FR didn't do anything, as expected. But I did still get the 30% increased HP ceiling and the instant 30% HP refill. For me, that's a little over 67K health.

I think I also hit a crazy luck streak with the RNG. I'll have to check the parses, but I had to have dodged a bunch.

Somewhere around 6% we were still going and our uber-tree pipes up on Vent, "San is a GOD."

Damn right.

We got the kill. Nailed with a Massacre right before Phase 2 and we still got the kill.

That. Felt. Good.

The night was over at that point, but we went and pulled Nefarian just for giggles.

Last night we spent 2.5 hours working on Nef. It was...rough. We only had one attempt (our last of the night) get far enough into Phase 2 to make it worth saying we got to Phase 2. But we learned at lot and I think when we get some more gear, we're going to be in a pretty good place.

That will probably be our last set of tries on Nef for a while. I think we're going to focus on gearing up a little more first. But if we can get 5/6 BWD in one night and then head over to BoT and make some good progress on the second night, it won't be too long.

Monday, May 2, 2011

For every action...

I've been playing WoW for a good, long time now. Over 5 years at this point. That's a lot of time to spend on one game, even one as expansive as WoW. Enough time that there really shouldn't be anything I hadn't seen or done.

Unfortunately, this is not the case. I did and saw a lot, but one thing I failed to do was really invest the time in seeing the Horde side of the game. In the past week, I've been lamenting this fact quite a bit.

Other than my first unofficial toon that I rolled on Norf's account way back in the day, I completely shunned the Horde until the waning weeks of Wrath. That's when I rolled Hotahinahu and steadily leveled him through the old-world (sticking almost exclusively to Kalimdor).

I knew there were storylines and experiences that I was missing and that would be gone forever once Cata hit. But I tried not to dwell on it. Short of taking an extended leave of absence from work and eating/sleeping/breathing WoW for a few weeks, there was nothing I could do at that point to experience them. I'd messed up and deprived myself of a good portion of the game, but oh well. Life goes on.

So why am I writing this post? What changed?

I've been leveling an Enchanter Rogue recently and, like Hotahinahu, I've been sticking almost exclusively to Kalimdor. (Mostly because when I leveled Grevioux, I stayed almost exclusively in EK.) As I've been doing so, I've noticed that a lot of my favorite quest lines are ones that relate back to things I did Horde-side prior to Cata...things no Alliance toon gets to see.

The second half of Thousand Needles is spent driving back the Grimtotem assault on the former Tauren encampments. If you'd never played a Horde toon through this zone you probably weren't familiar with Arikara (Magatha's Wind Serpent familiar), Cliffwatcher Longhorn, Arnak Grimtotem or Lakota Windsong. You had no previous interaction with them so you don't know the history they have in that zone. You don't know you're missing it, so you probably don't give it a second thought. But seeing them all there again really made the zone feel complete.

Same with Felwood and the events at Bloodvenom Post.

And as I went through Desolace and helped unify the Centaur clans? I couldn't imagine how my Tauren Warrior would feel about that. Had I rolled Hotah, I never would have given it a second thought. But as it stands...I felt dirty the whole way through that questline.

Those moments, though. They were shining examples of what can make a really strong, compelling game. When your current situations can be directly correlated to your past actions...even if that's "you" as a player, not a specific toon. It drove home this point that, Horde or Alliance, your actions can affect everyone on Azeroth. But to really see that, you have to know both sides.

I keep wondering how many other things like this I deprived myself of by never taking the time to fully experience the Horde side of the game.