
Sindragosa is the former consort of Malygos, killed by Neltharion (that would be Deathwing before he adopted his new emo moniker) just before the Great Sundering. Unable to make to the Dragonblight before dieing, she collapsed on the north end of Icecrown swearing hate on just about everything.
Thousands and thousands (and thousands) of years later, Arthas decided that a very angry (albeit, dead) blue dragon would make the perfect queen of the Frostbrood. So he brought her back. You may remember this event:
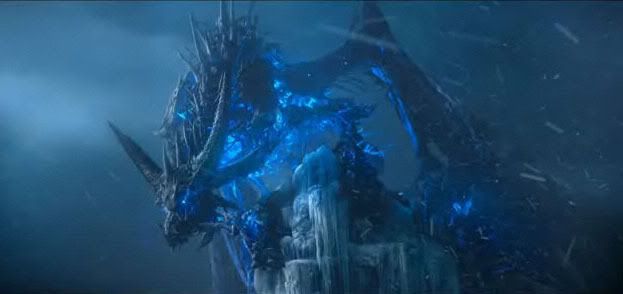
Look familair?
Since that time, she's taken up residence at the end of the Frostwing Halls in Icecrown Citadel. She's also gone from the badass beauty pictured above to the most aggravating boss ever (thanks to some truly special voice acting).
Sindragosa is a two stage fight that will test your raid's awareness and reflexes.
A good Frost Resist set (completely filled up with Stam gems) is insanely helpful for this fight. Sindy hits reasonably hard, but not hard enough to be the real danger in this fight. What is dangerous is the massive amount of frost damage flying around. You've got a persistant Frost Aura, a personal DoT that has a chance of stacking every time you hit, a big-damage Frost Breath, and a Frost Nova effect that does more damage the closer you are to the center of it (which is the ground beneath the center of Sindy's body). To add to this, once Phase 2 rolls around the damage from each of these sources is going to multiply via Mystic Buffet.
It's worth noting here that during Phase 1 only one tank is needed. As Ferals we're often going to end up going cat and doing some dps. We'll be doing it in our tank specs and gear (because we're needed to tank for Phase 2) but we often perform marginally better than our pure-tank counterparts.
Of course, this is a Bear's guide so I'll talk about tanking both phases.
The pull:
The last of the trash prior to Sindragosa is a pair of Frost Wyrms: Rimefang (who you may remember from PoS) and Spinestalker. You'll pull and defeat these two individually. Sindragosa will aggro the moment the second one dies. However, if you run back into the gauntlet room you came from before the door closes you'll reset the encounter and then can heal up, buff, and pull at your leisure.
Phase 1:
Phase 1 has two alternating mini-phases: ground and air.
Ground comes first and will start when you aggro Sindragosa. She will fly down into the center of the balcony. Pick her up and turn her 90° so that her side is facing the rest of your raid (who should be waiting on the stairs).
At this point, simply hold her.
Watch for her to cast Icy Grip. It doesn't affect the tank, but it's very easy to recognize as the rest of your raid will get pulled to the center of her body. Immediately after she does this she'll begin casting Blistering Cold. Rather than move, it's usually best to pop Barkskin (and Enrage if you have your 4pc T10 bonus). Between those and your Frost Resist you'll be fine.
Also (especially at the very early stages of the fight) it's important to keep an eye on your stacks of Chilled to the Bone. Our attack speed is very slow so they'll often drop off before they get too high. But any time they reach 4 or more it's a good idea to stop attacking until they drop off. Make sure to warn your raid when you need to do this so that no one else pulls aggro.
At 85% (and then every 1:50 thereafter) Sindragosa will launch into the air.
When she does this all players should run back to the stairs. You should shift into cat form at this point to clear the speed reduction debuff you may have from a recent Frost Breath.
Sindragosa will mark two players (other than the tank, I believe). After 7 seconds the marked players will become entombed in ice.
It's important that the entombed individuals are at lest 10 yards apart. Similarly, no one should be within 10 yards of them until the ice forms, otherwise it will chain to those individuals as well.
Typically we have the two marked individuals stand at the base of the stairs, about 2 or 3 steps away from the stripe on the ground, one to the left and the other to the right.
Once the two players are entombed, pile up in two groups behind them and begin to dps them down slowly. If at any point one gets down below 15%, stop dps on it. Sindragosa will launch 4 Frost Bombs (one at a time) at the ground, similar to what Sapphiron does in Naxx. You'll have to use the Frost Tombs to stay out of line of sight of the bombs until all 4 have gone off.
Unlike Sapph--who always dropped her bomb right in the center of the room--Sindragosa can place them anywhere on the flat surface of the balcony. The ground at the landing spot will turn white and swirly. You may have to move around to different sides of the ice tombs in order to stay out of line of sight, so be aware. Also, in the event that a bomb is going to land directly under a tomb, it will be considered out of line of sight. So don't panic.
Also, the people inside the ice will be choking, so healers will have to keep them topped off.
Once the 4th bomb has gone off, run back out to Sindragosa's landing spot and get ready to pick her up again while the rest of your raid finishes DPSing down the tombs.
Phase 1 should be considered a speed phase. You want to get through this as quickly as possible.
Phase 2:
At 35% Sindragosa will enter Phase 2. During this phase, Sindragosa becomes permanently grounded. She retains all of her abilities from the ground portions of Phase 1 and then gains two new ones.
First, she will continue to mark and entomb members of your raid, one at a time. This happens in fairly rapid succession. The mechanics work exactly the same as during the air phase. Once marked the person with the mark will have 7 seconds before they become entombed. Anyone within 10 yards of them at that point will also be entombed. Entombed individuals will be choking to death until they're broken out.
Secondly, she will be applying stacks of Mystic Buffet to anyone in line of sight every 5 seconds.
To break line of sight, you need to hide behind an entombed player long enough for the stacks to drop off. This includes the tanks. During this phase the tanks will be swapping aggro. While one is holding Sindragosa the other will be dropping their stacks of Mystic Buffet. Once the stacks have been dropped, swap again.
It's usually best if Sindragosa doesn't move much during this phase. So tanks will typically stand on top of each other when swapping. Try to time this so you don't both eat a Frost Breath at the same time.
Also, as I said, all ground abilities from Phase 1 are still in play. This includes Icy Grip and Blistering Cold, which can affect you as you're trying to dump your stacks. Be aware if you were tanking in Phase 1 and were immune to the Grip. It will probably be a little bit of a shock. Just remember to get out as fast as possible. Dash if you need to.
Phase 2 is a control phase. Slow and steady wins the race. Execution is what's important here, not speed (which is why you want to get through Phase 1 as quickly as possible).
People need to manage their stacks of Mystic Buffet and keep them getting too high.
People need to be aware of who is marked to be entombed and stay away from that person. When a person is marked they need to clear away from everybody. Chained tombs will almost certainly wipe your raid.
In our raids we drop smoke flares just prior to Phase 2 at the locations to which we want the entombed people running. It gives marked people a clear idea of where to go and everyone else a clear idea of where to keep clear.
Icy Grip and Blistering Cold are the biggest killers during this phase. The stacks of Mystic Buffet make slow reactions a death sentence. Additionally, it's easy to run into an ice tomb on your way out and lose precious seconds.
Tombs need to be managed. You don't want too many up at a time and you don't want the people inside to have to be kept alive for too long. At the same time, they need to be left up long enough that raid members can drop their stacks of Mystic Buffet.
In our raids we usually put a fast-attacking or dual-wielding melee class on primary tomb-breaking duty, like a Rogue, Cat Druid, Enh Shaman, Fury Warrior or Frost DK. This way they don't have to worry about managing Chilled to the Bone stacks during this phase (which can be very annoying for those classes) and it keeps one more person out of the crowded melee area under Sindragosa in case a tomb accidentally gets dropped there. It also frees the rest of the DPS to focus on Sindragosa.
If a healer or the tomb breaker gets entombed, everyone gets them out as quickly as possible.
Once she's down, there's a few things to look forward to as a bear. On 10-man she can drop the Vambraces of the Frost Wyrm Queen. On 25-man she drops the super-stamified Sindragos'a Flawless Fang and a Vanquisher's Mark of Sanctification that you can use to upgrade one of your tier pieces.
As with all my boss strats, I'm writing from the overall perspective of a Bear tank (in 10-man) and what they will need to do. For you Cats reading this blog, I suggest you check out Dinaer's guides on Forever a Noob. They're written for Rogues but are a pretty good guide for melee in general and his gear drop suggestions (with the exception of weapons) will be spot on for Cats. If I have additional insight, I will try to add it in my blog.


Another thing to mention is the Frost Breath debuff. This has almost no effect on a Feral Druid. A good powershift macro will take the debuff off, allowing bears to continue attacking at full speed, and have full movement speed still.
ReplyDeletei've been drinking bird nest soup every night (i only get the homemade kind back at home). the only reason why i drink it is because it's supposed to be good for complexion.
ReplyDeletei’ve been taking the store-bought kind online (e.g. www.geocities.jp/hongkong_bird_nest/index_e.htm of famous branded only of course) which is directly mailed from Hong Kong. this would be at a more affordable price.
A powershift macro to get rid of the debuff is a good idea for anyone that might be having threat issues during this fight. The combination of Unchained Magic and Chilled to the Bone make this a very easy fight to maintain threat through, though. Especially if you have the benefit of Misdirects and ToTs in your raid.
ReplyDeleteThat, and our slow attack speed combined with that debuff make it very easy to manage our own stacks of Chilled to the Bone. They'll often drop off before they stack too high.
For phase or tank transitions when you actually need to be getting somewhere...most tank build include 2/2 Feral Swiftness, which actually makes it more beneficial to shift into Cat rather than power shift.
But it's a good point. And, like I said, anyone that might be having threat issues (especially in the early stages of the fight) would definitely benefit from a power shift macro to get rid of the debuff.